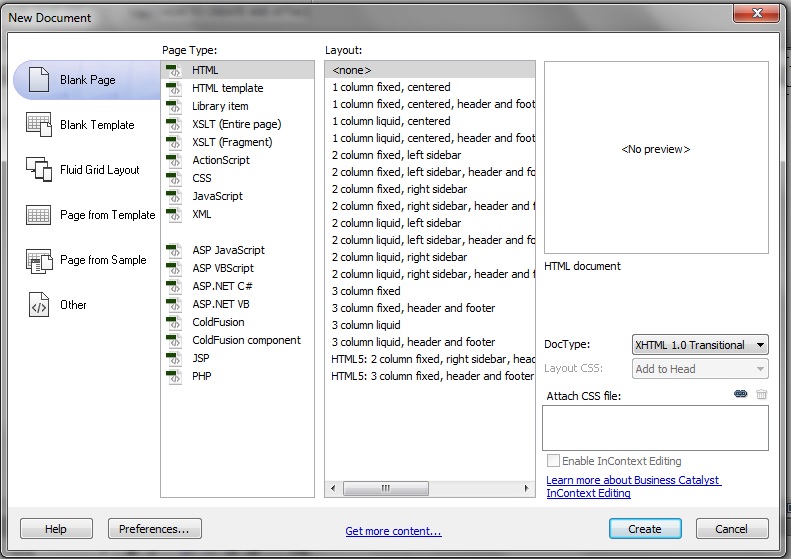
Go to File on Dreamweaver Tool Bar. Click New. For Page Type, make sure "HTML" is selected. For Layout, select <none>.
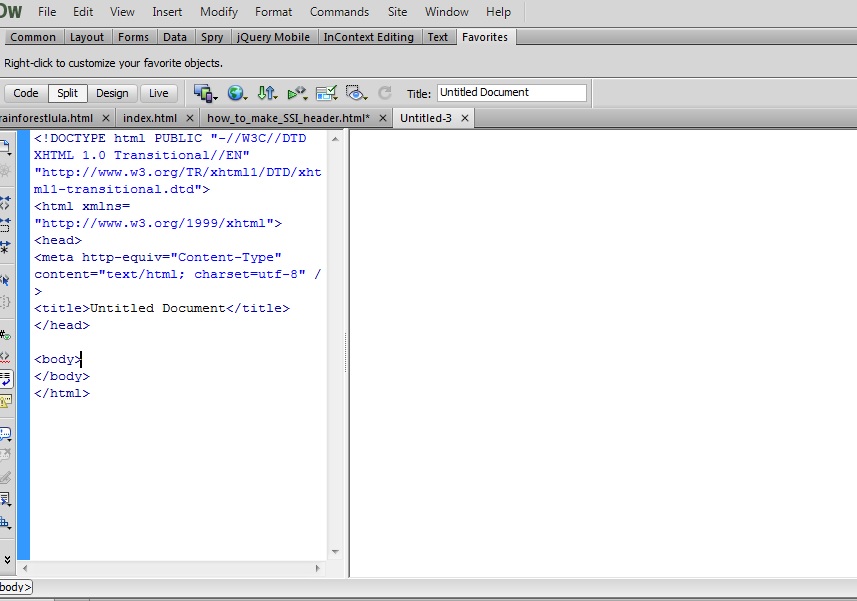
The next step is to click the "Split" option for viewing code. The button is just below the tool bar.
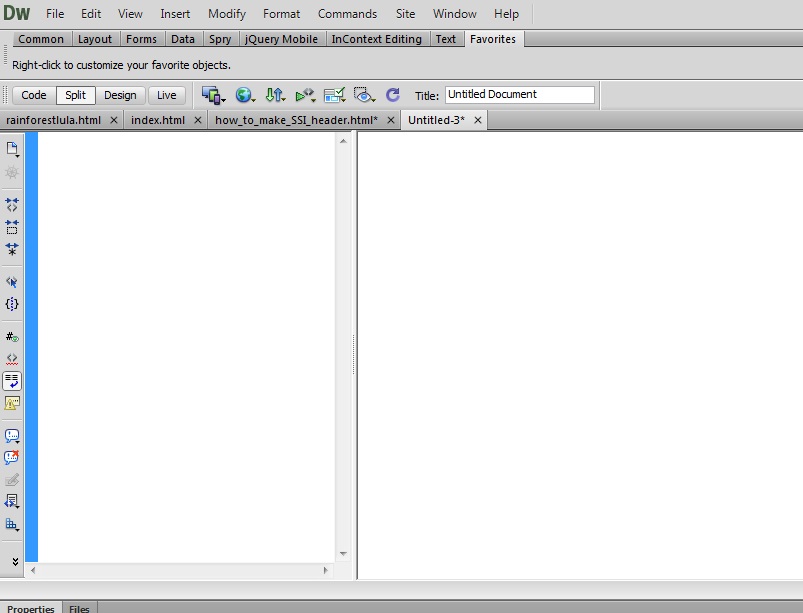
In the window to the left (which is the view of the code), delete all the code:
THIS....
BECOMES THIS....
Now, copy and paste the following code into the code window.
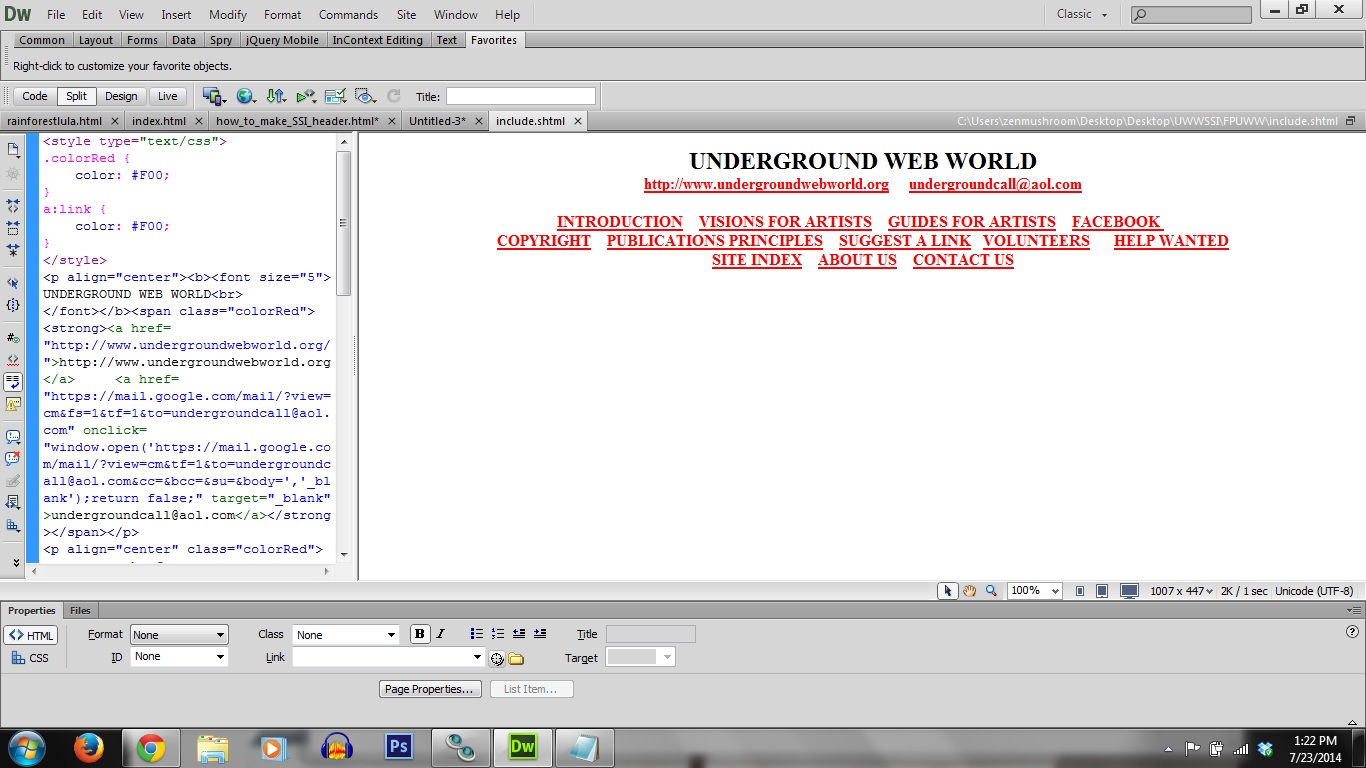
I attached my include file into this email. You can take the code from my include file, and paste it into your code window. (This will be the code for the UWW header). Another way to get this code is to get it from the UWW website by copying the header directly onto the design part of the page.
YOUR FILE SHOULD LOOK SOMETHING LIKE THIS NOW
The next step is to save your file as "include.shtml". Make sure "server side include" is selected in the saving options.
Now it is time to attach your server side include to the header of your entire website.
Pick one document in your website, it can be any document. Put your cursor after the </head> end tag.
Select "insert" in the tool bar > Click Server Side Include
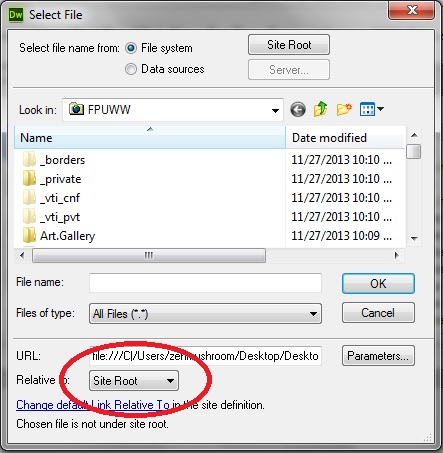
Find the SSI file you created, "include.shtml"
When you click this file, make sure "site root" is selected in "Relative to."
Since the include file is inserted after the head section of your page, it should appear in your header. To test this out, click the "live" button. The live button is next to the "split" and "design" buttons, which are under the tool bar.
Now that you have attached your include file to one page, you are ready to attach it to your entire website. You will do this with the Find and Replace function.
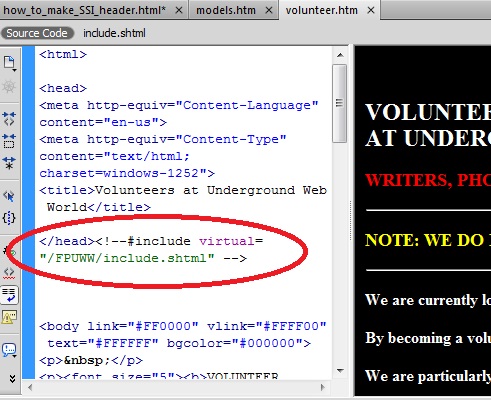
To call up the "Find and Replace" function, hit Ctrl F on your keyboard. The find and replace window will pop up. In the find section type </head>. In the replace section type </head> followed by the code for your SSI include. To get the code for your SSI include, look at the tag that is located after the </head> tag in your page's source code.
This is what mine looks like. Make sure you are getting your own code though, because yours may be different than mine.
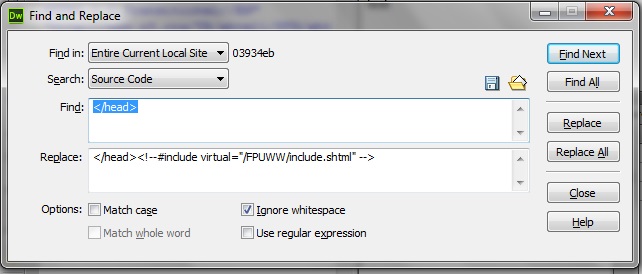
This is what your find and replace window should look like:
In "Find in:" make sure the option "Entire Local Site" is selected.
After that, the SSI include should be placed on every header of your entire website. You can click the "live" button to see if this worked. Anytime you make a change to the include file, the rest of the headers on your site will automatically change as well.
If you have any problems, call and let me know. Best of luck!